In this tutorial, we will look into how to download, install, and configure the latest version of MongoDB on your Windows 10 computer.
Table of Contents
What is NoSQL?
First of all, you’ve to understand the meaning of “NoSQL databases.” This buzzword is roaming around the software world frequently. They are used to refer to non-relational databases.
NoSQL databases come in a variety of types based on their data model. Below are the main types of NoSQL databases.
- Document databases – store data in documents similar to JSON objects
- Key-value databases – each item contains keys and values
- Wide-column databases – store data in tables, rows and dynamic columns
- Graph databases – store data in nodes and edges
NoSQL databases provide flexible schemas and scalability to handle large amounts of data and high user traffic.
What is MongoDB?
MongoDB is the world’s most popular NoSQL document type database. MongoDB stores data in flexible, JSON-like documents. The benefit of such a type is that the fields of JSON documents can vary from document to document, and the structure of the data can be changed over time.
Some of the key features of MongoDB
- MongoDB is free to use (Community edition)
- Provide ad hoc queries, indexing, and real-time aggregation out of the box
- A distributed database at its core
- High availability
- Horizontal scaling
- Geographic distribution etc.
Download MongoDB on Windows
Step 1: Go to the MongoDB official website.
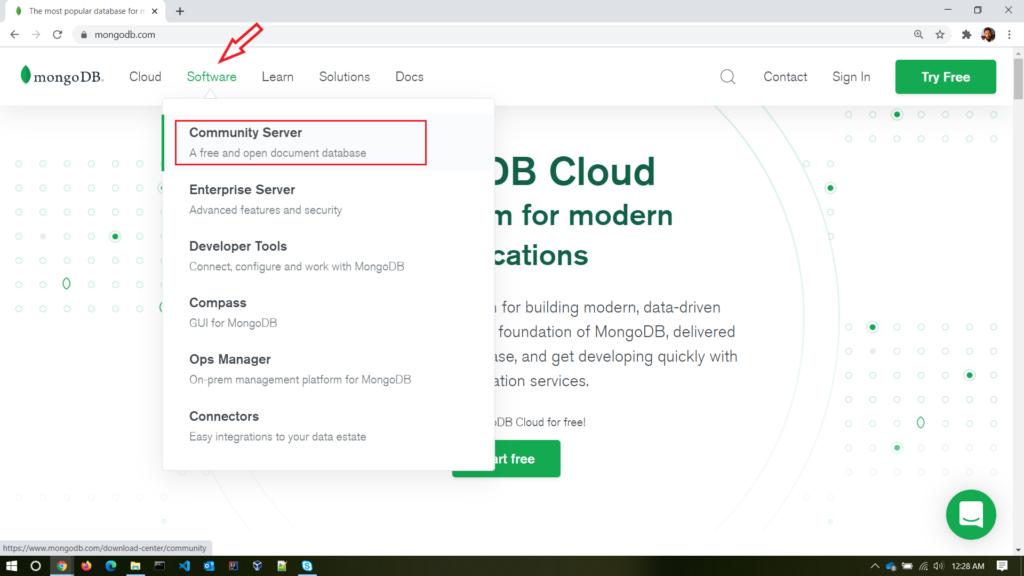
Step 2: Select the community server option from the software menu in the header.
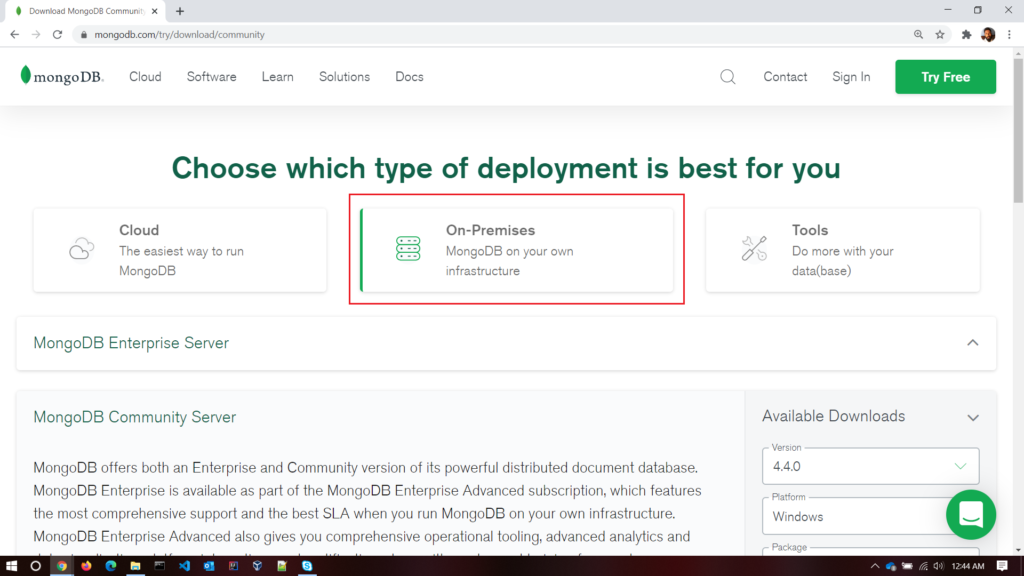
Step 3: Choose the On-Premises option since we are downloading it to our local windows machine.
Step 4: From the available downloads
- Select the latest version
- Select the windows as the platform
- Select the
msias the package type, and hit the download.
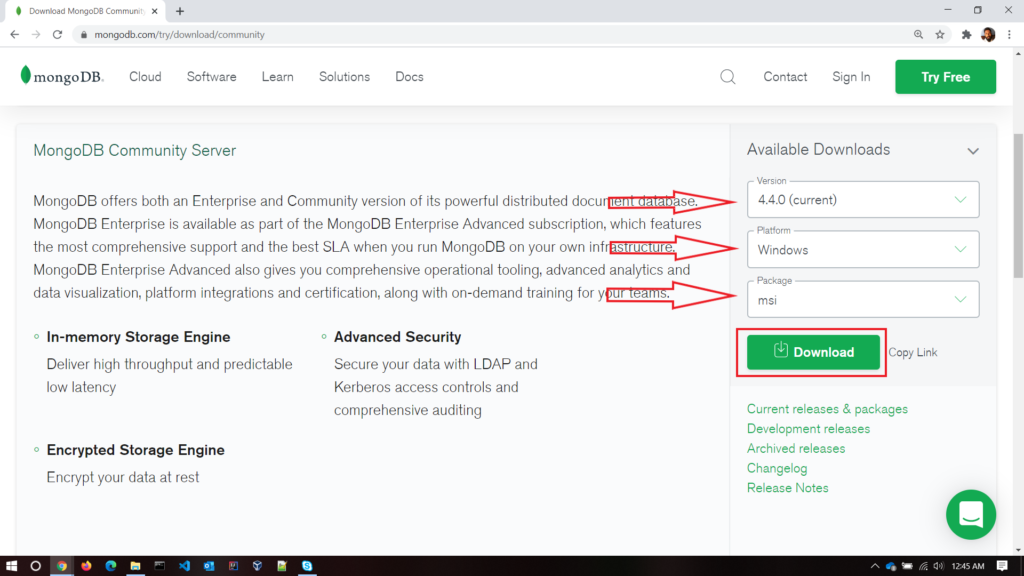
Then the MongoDB executable file will download into your computer. After downloading the executable file, make it run, and will begin the installation process.
Install MongoDB on Windows
Here is the step by step guide to install the MongoDB on your Windows 10 machine.
Step 1: Double click on the executable file (.msi file) which you’ve downloaded. By default, this is in your downloads directory.
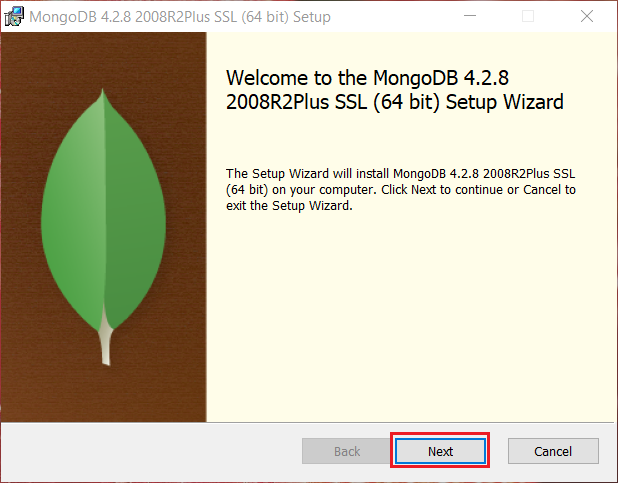
Hit on the next button.
Step 2: Read the end-user license agreement and tick the “I accept the terms in the license agreement.”
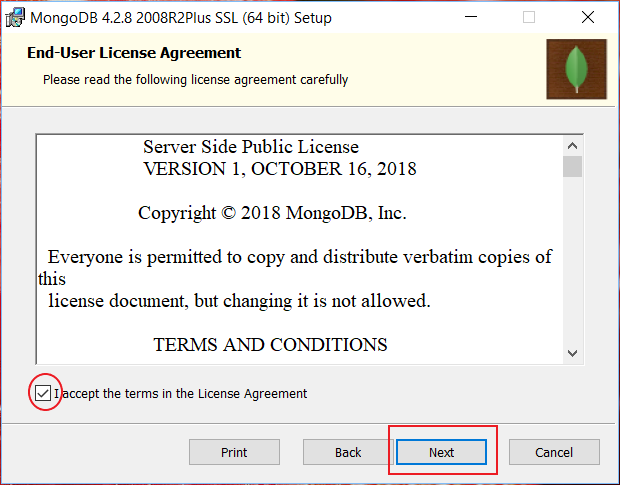
Click next button.
Step 3: Now, we want to choose the installation type for our windows machine. I will choose Complete. It will be suitable for most users.
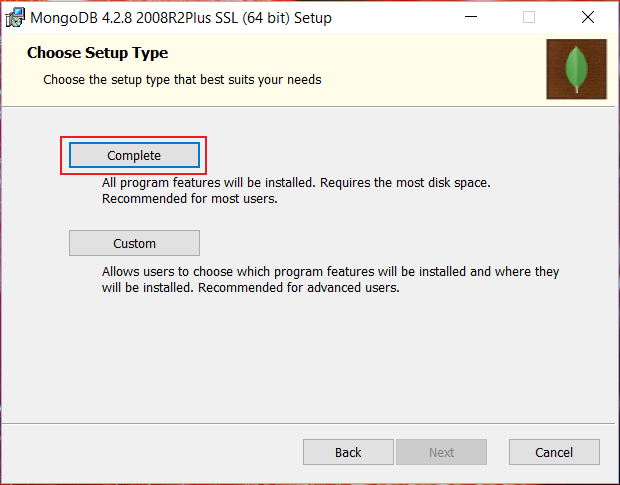
complete setup option installs MongoDB and the MongoDB tools to your Windows machine’s default location.
Step 4: Starting from MongoDB 4.0, you can setup MongoDB as a windows service.
- Select install MongoDB as a service option
- Select the run service as Network Service user (default)
- Keep the default values for the service name, data directory, log directory.
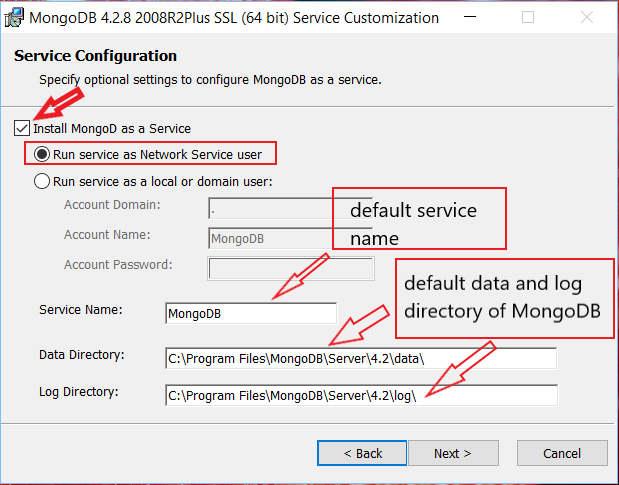
Then hit the next button.
Step 5: Select the install MongoDB compass option and hit the next button.
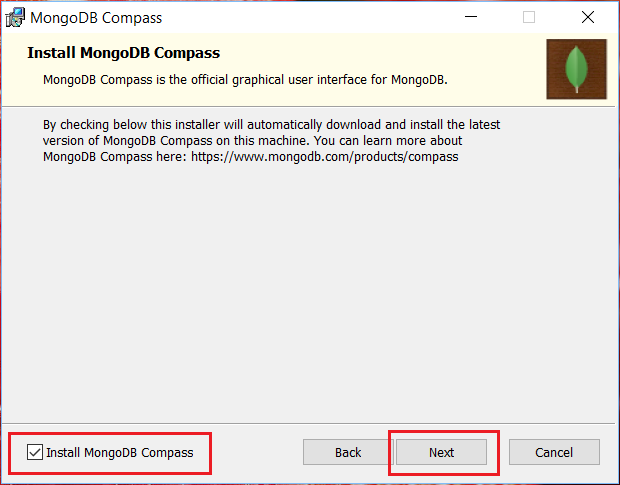
MongoDB compass is the GUI for MongoDB. You can get more information from the MongoDB official website.
Step 6: Then click install.
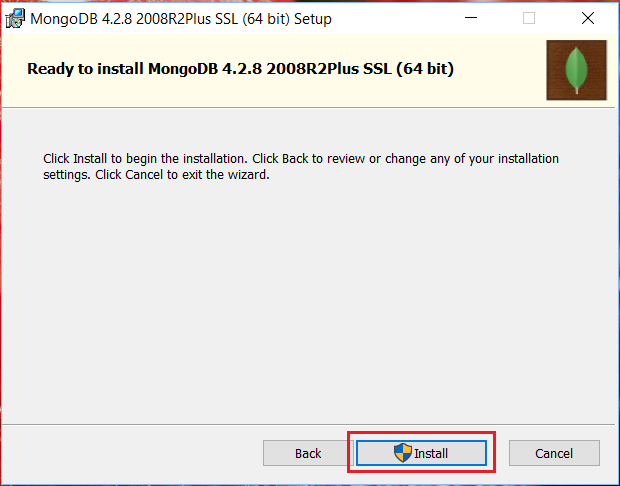
Step 7: After installation completed, click the finish button.
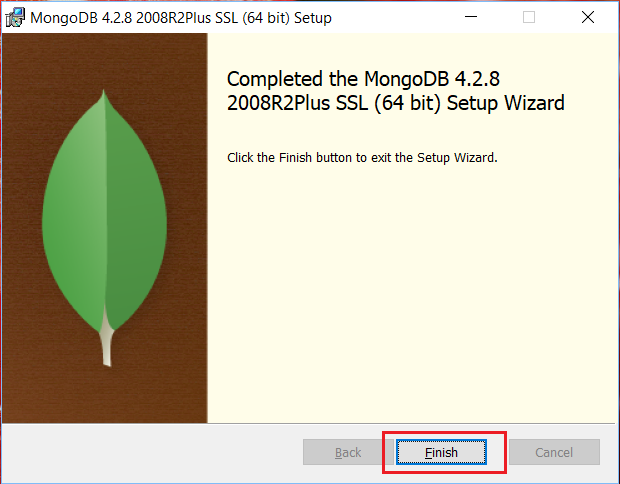
All right, now you’ve installed the MongoDB community edition and the MongoDB Compass tool on your windows 10 machine.
Let’s verify by creating a database and document in MongoDB.
Run the MongoDB on Windows
To test whether we have installed the MongoDB server on our windows machine, we can create a database and document using the Mongo Shell.
Navigate to the installation folder of your MongoDB instance. Normally it should reside in the below location in the windows machine.
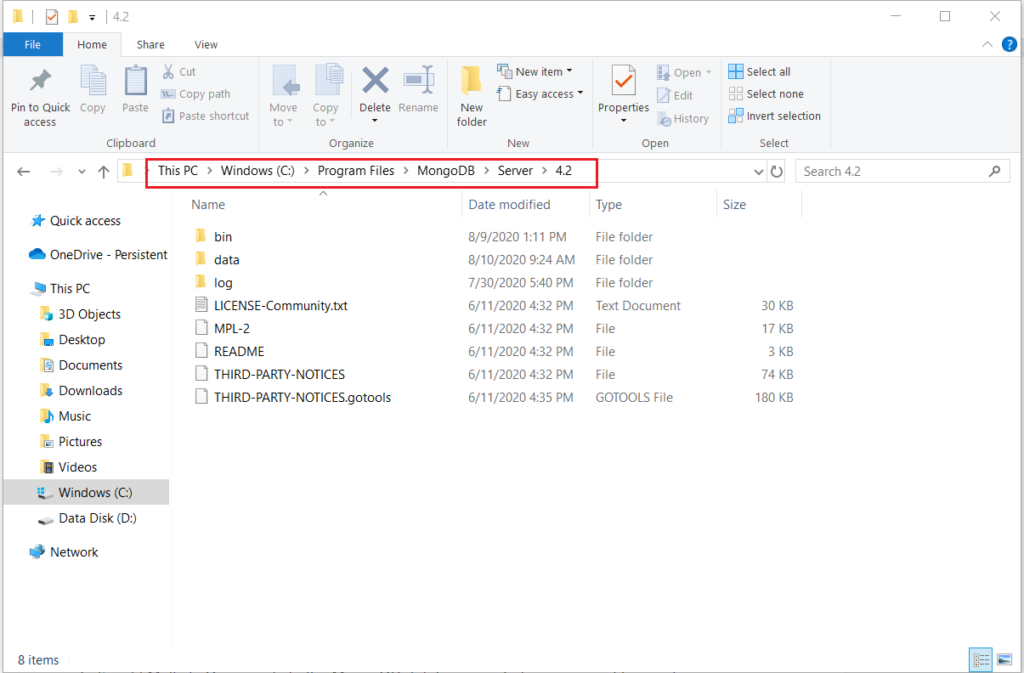
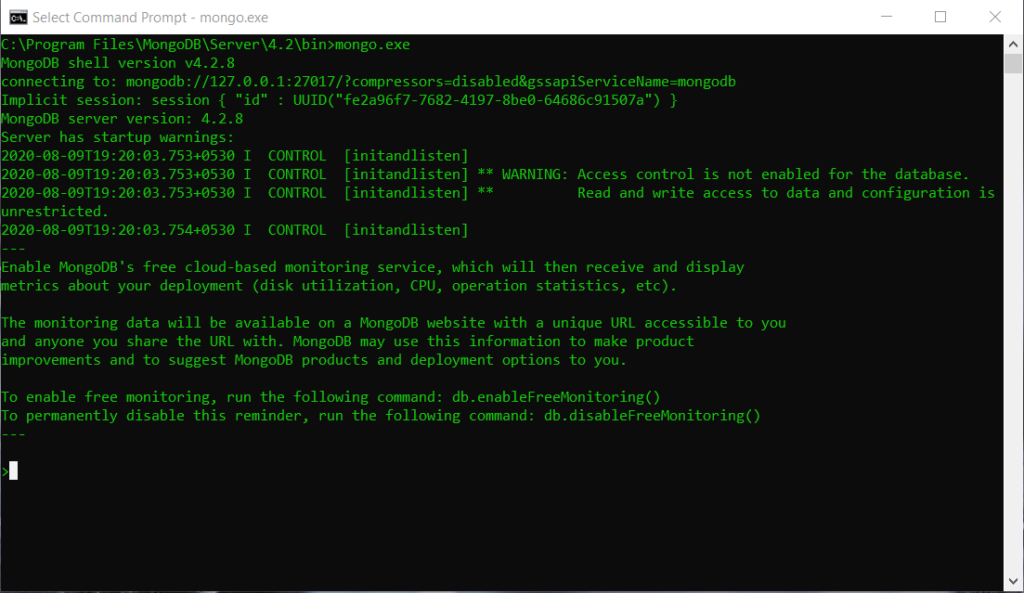
To run the MongoDB instance, double click the mongo.exe file or navigate to the below path using the windows command line or Powershell.
C:\Program Files\MongoDB\Server\4.2\bin\mongo.exeNote: server version can be changed when you watch this guide. Mine it’s 4.2
After you’ve provided the above path to the windows command line, hit enter.
Insert Operation in MongoDB
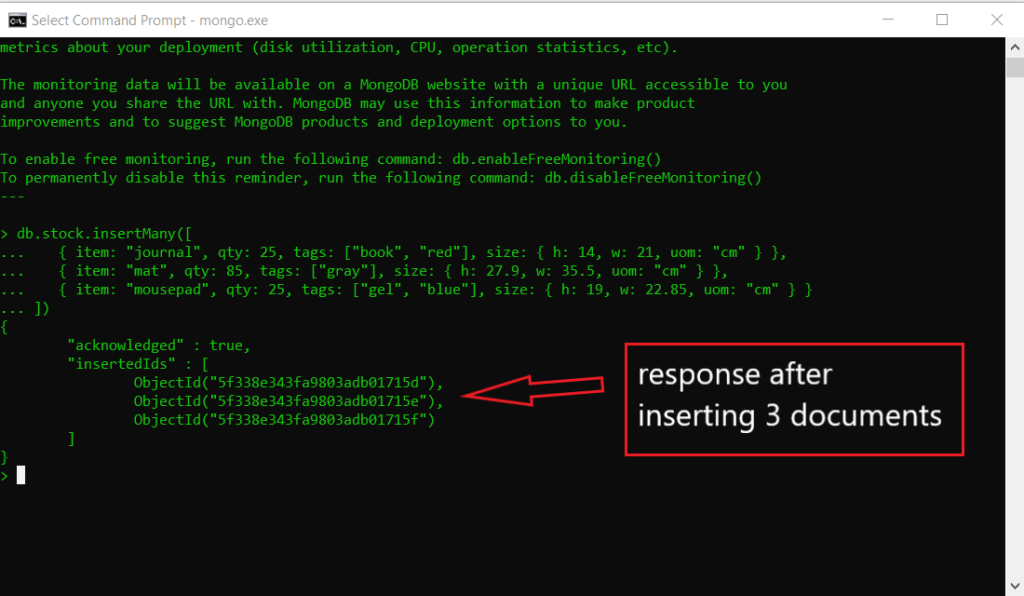
Let’s add Multiple Documents to the MongoDB database. Use the below command to insert.
db.collection.insertMany() can insert multiple documents into a collection. We can pass an array of documents to the insertMany() method.
db.stock.insertMany([
   { item: "journal", qty: 25, tags: ["book", "red"], size: { h: 14, w: 21, uom: "cm" } },
   { item: "mat", qty: 85, tags: ["gray"], size: { h: 27.9, w: 35.5, uom: "cm" } },
   { item: "mousepad", qty: 25, tags: ["gel", "blue"], size: { h: 19, w: 22.85, uom: "cm" } }
])
When you insert the above query, you’ll get below output.
Query Operation in MongoDB
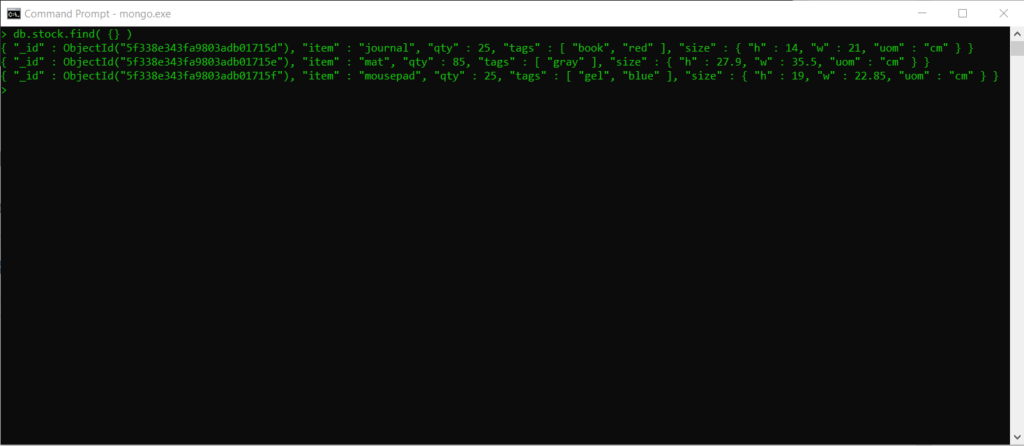
Let’s query the documents which we have added to our MongoDB database. Use below command for the query.
db.stock.find( {} )Above will select all documents from the stock collection which we have inserted to the test database.
Below is the output of the above code line.
All the above operations can perform using the MongoDB compass application as well. It’s more visually appealing than using the Mongo Shell.
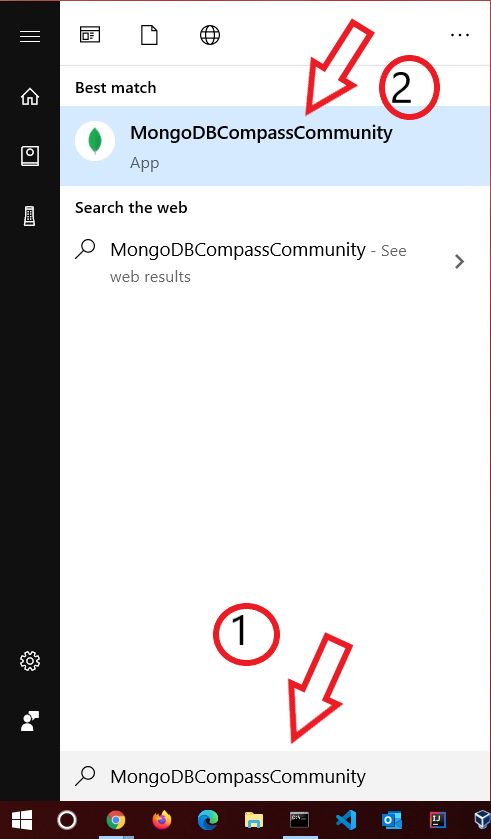
Step 1: Search the “MongoDBCompassCommunity” in your windows machine and launch the application.
Step 2: Now, you have to establish a connection with the MongoDB server. For that click on the “Fill in the connection fields individually” link.
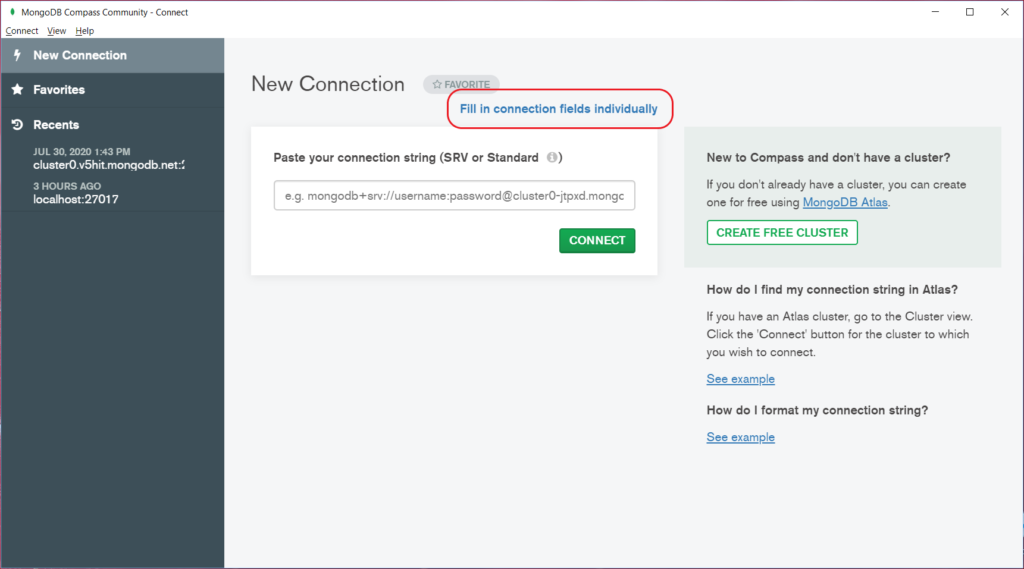
Step 3: Provide Hostname as localhost and Port as 27017 if they aren’t in those correspondent fields. Then hit the connect button.
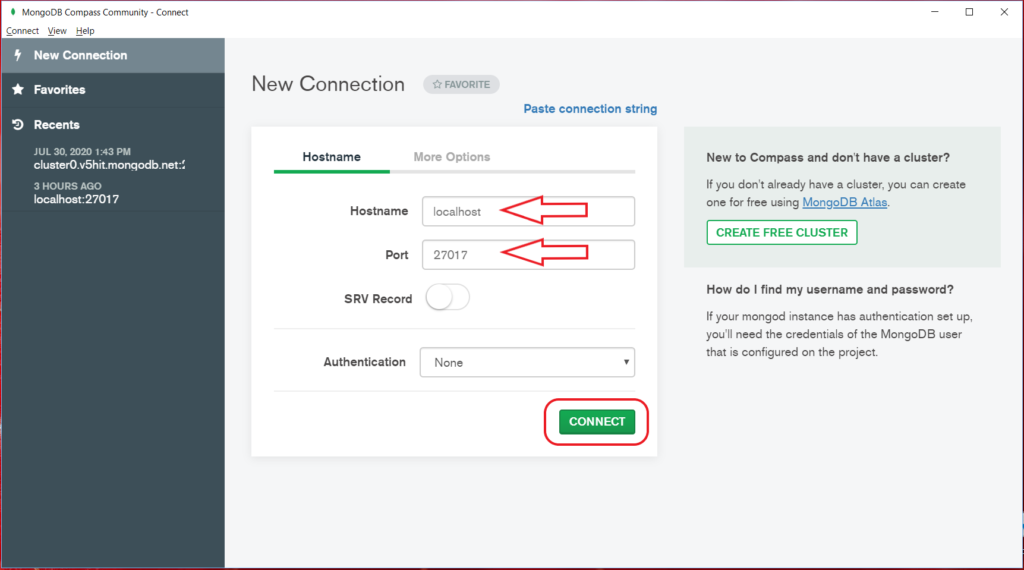
Step 4: Now, you’ve connected to the MongoDB server. From now on you can do any operation as you did in the MongoDB Shell.
Conclusion
In this guide, you have learnt about how to install MongoDB on a Windows 10 computer. As you already know, MongoDB is a NoSQL document type database. You can use the Mongo Shell or Compass GUI tool for all the database operations. Read more about the configuration and installation guide from the MongoDB official website.

Great Tutorial Thanks 🙂
Thank you Prabodha.